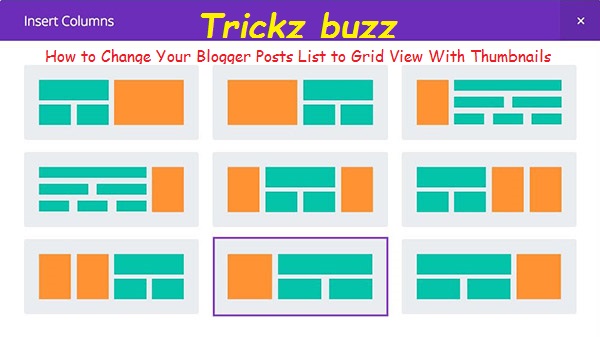
Today I am sharing a great and the most popular trick to show grid style posts in blogger blog. This is the must thing in you are blogging on niches like Images or Templates. It looks professional when you show out grid styling in your blog. It makes your visitors show more of your posts and it also increases your page views because the visitors has to click the post to fully read it. Also, you can edit the code to your needs. To show this you must have an image in your blog post. So If you are interested in showing grid posting to your blogger blog then follow the steps below.
Features:
1.) All Post Becomes Grid Styled.2.) Post Is Untouched While Editing.
3.) Length Of The Post (On Home, Labels, And Archive Pages) Can Be Changed, But It Affects All The Posts.
4.) Auto Read More Will Applied On All Posts, No Exception.
5.) The First Picture In Each Post Will Be Automatically Used As A Thumbnail (On Home, Labels And Archive Pages). You Can Also Choose Not To Show Thumbnail.
5.) Only Loads The Snippet (On Home, Labels, And Archive Pages).
6.) It's Will Make Professional Looking Blog.
7.) Visitors Have To Click Read More To View The Full Post That Will Increases Your Page Views.
8.) Will Decrease Your Page (On Home, Labels, And Archive Pages) Loading Time.
9.) Perfect For Better SEO.
10.) You Don't Have To Add -The Jump Break- In Every Post.
11.) It Will Effect All Of Your Post In Your Blog (New To Old).
12.) 99% Of Blogger Are Using This Code.
13.) Uses HTML-Javascript Code.
14.) Quick To Load And Easy To Install.
15.) No Any External File Added.
16.) No Copyright Code POPUP Or Redirect.
17.) Will Show Image First Then Post Title And Then The Rest.
18.) Code Is Secured.
19.) You Have To Change Come CSS In The Below Code To Match It With Your Template.
How To Add In Your Blog:
1.) Go To Your www.blogger.com2.) Open Your Desire Blog.
3.) Go To "Template".
4.) Click "Edit HTML".
5.) Click "CTRL+F" Inside The Template BoxTo Find </head> Code.
6.) Now Copy The Below Code And Paste It Before The Above Code.
<!-- Auto Auto Image Thumbnail & ReadMore Link By TrickzBuzz Start -->
<b:if cond='data:blog.pageType != "item"'>
<b:if cond='data:blog.pageType != "static_page"'>
<style type='text/css'>
.date-outer .post-outer{width:46%;float:left;margin:20px 0px 0px 20px;height:490px;}
.date-outer .post-outer .post-body {font-family:Helvetica, Arial;font-size:13px;height:432px;}
.date-outer .post-header {margin:0px;}
.date-outer .post-outer h2.mbb_post_TITLE {margin:0px;font-size:24px;font-family:fantasy;font-weight:normal;}
.date-outer .post-outer h2.mbb_post_TITLE a:hover{text-decoration:underline;}
.date-outer .post-outer img.mbb_post_IMG {width:240px;height:240px;margin-bottom:4px;}
.date-outer .post-outer .mbb_post_Desc {font-size: 12px;padding: 10px;display: block;}
.date-outer .post-outer .post-footer {text-align:left;display:block;padding:10px;font-size:11px;}
#mbb_readmore {background:#424242;color:#fff;padding:5px;text-decoration:none;margin-top:4px;display:block;width:90px;float:right;}
.post-title, .post-author, .post-timestamp, .post-icons, .post-labels, .post-location, .author-profile, .date-header, .jump-link {display:none;}
</style>
<script type='text/javascript'>
//<![CDATA[
var noImgSum = 800;
var imgSum =180;
var _0xa07b=["\x3C","\x69\x6E\x64\x65\x78\x4F\x66","\x73\x70\x6C\x69\x74","\x6C\x65\x6E\x67\x74\x68","\x3E","\x73\x75\x62\x73\x74\x72\x69\x6E\x67","","\x6A\x6F\x69\x6E","\x63\x68\x61\x72\x41\x74","\x20","\x2E\x2E\x2E","\x67\x65\x74\x45\x6C\x65\x6D\x65\x6E\x74\x42\x79\x49\x64","\x69\x6D\x67","\x67\x65\x74\x45\x6C\x65\x6D\x65\x6E\x74\x73\x42\x79\x54\x61\x67\x4E\x61\x6D\x65","\x3C\x64\x69\x76\x20\x63\x6C\x61\x73\x73\x3D\x22\x65\x78\x65\x5F\x70\x6F\x73\x74\x5F\x44\x49\x56\x22\x3E\x3C\x69\x6D\x67\x20\x63\x6C\x61\x73\x73\x3D\x22\x65\x78\x65\x5F\x70\x6F\x73\x74\x5F\x49\x4D\x47\x22\x20\x73\x72\x63\x3D\x22","\x73\x72\x63","\x22\x20\x2F\x3E","\x3C\x68\x32\x20\x63\x6C\x61\x73\x73\x3D\x22\x65\x78\x65\x5F\x70\x6F\x73\x74\x5F\x54\x49\x54\x4C\x45\x22\x3E\x3C\x61\x20\x68\x72\x65\x66\x3D\x22","\x22\x3E","\x3C\x2F\x61\x3E\x3C\x2F\x68\x32\x3E\x3C\x73\x70\x61\x6E\x20\x63\x6C\x61\x73\x73\x3D\x22\x65\x78\x65\x5F\x70\x6F\x73\x74\x5F\x44\x65\x73\x63\x22\x3E","\x69\x6E\x6E\x65\x72\x48\x54\x4D\x4C","\x3C\x2F\x73\x70\x61\x6E\x3E\x3C\x2F\x64\x69\x76\x3E"];function removeHtmlTag(_0xe2dax2,_0xe2dax3){if(_0xe2dax2[_0xa07b[1]](_0xa07b[0])!=-1){var _0xe2dax4=_0xe2dax2[_0xa07b[2]](_0xa07b[0]);for(var _0xe2dax5=0;_0xe2dax5<_0xe2dax4[_0xa07b[3]];_0xe2dax5++){if(_0xe2dax4[_0xe2dax5][_0xa07b[1]](_0xa07b[4])!=-1){_0xe2dax4[_0xe2dax5]=_0xe2dax4[_0xe2dax5][_0xa07b[5]](_0xe2dax4[_0xe2dax5][_0xa07b[1]](_0xa07b[4])+1,_0xe2dax4[_0xe2dax5][_0xa07b[3]]);} ;} ;_0xe2dax2=_0xe2dax4[_0xa07b[7]](_0xa07b[6]);} ;_0xe2dax3=(_0xe2dax3<_0xe2dax2[_0xa07b[3]]-1)?_0xe2dax3:_0xe2dax2[_0xa07b[3]]-2;while(_0xe2dax2[_0xa07b[8]](_0xe2dax3-1)!=_0xa07b[9]&&_0xe2dax2[_0xa07b[1]](_0xa07b[9],_0xe2dax3)!=-1){_0xe2dax3++;} ;_0xe2dax2=_0xe2dax2[_0xa07b[5]](0,_0xe2dax3-1);return _0xe2dax2+_0xa07b[10];} ;function MBBautoReadMore(_0xe2dax7,_0xe2dax8,_0xe2dax9){var _0xe2daxa=document[_0xa07b[11]](_0xe2dax7);var _0xe2daxb=_0xa07b[6];var _0xe2daxc=_0xe2daxa[_0xa07b[13]](_0xa07b[12]);var _0xe2daxd=noImgSum;if(_0xe2daxc[_0xa07b[3]]>=1){_0xe2daxb=_0xa07b[14]+_0xe2daxc[0][_0xa07b[15]]+_0xa07b[16];_0xe2daxd=imgSum;} ;var _0xe2daxe=_0xe2daxb+_0xa07b[17]+_0xe2dax9+_0xa07b[18]+_0xe2dax8+_0xa07b[19]+removeHtmlTag(_0xe2daxa[_0xa07b[20]],_0xe2daxd)+_0xa07b[21];_0xe2daxa[_0xa07b[20]]=_0xe2daxe;} ;
//]]>
</script>
</b:if>
</b:if>
<!-- Auto Auto Image Thumbnail & ReadMore Link By TrickzBuzz Script End -->
7.) After That, Find This Below Code Using "CTRL+F.
<data:post.body/>
8.) You Will Find Three Of Them, Replace The Third One With The Following Code.
<!-- Auto Auto Image Thumbnail & ReadMore Link By MyBloggerBuzz Script Start -->
<b:if cond='data:blog.pageType == "item"'>
<data:post.body/>
<b:else/>
<b:if cond='data:blog.pageType == "static_page"'>
<data:post.body/>
<b:else/>
<div expr:id='"summary" + data:post.id'><data:post.body/></div>
<script type='text/javascript'> MBBautoReadMore("summary<data:post.id/>", "<data:post.title/>", "<data:post.url/>" );
</script>
<a expr:href='data:post.url' id='mbb_readmore'>Read More...</a>
</b:if>
</b:if>
<!-- Auto Auto Image Thumbnail & ReadMore Link By TrickzBuzz Script End -->
9.) Click Preview. If It Works, Then Click Save.
Customization:
1.) Change The CSS According To Your Desired.2.) If Your Post Have No Images Then The Words On Main Pages (On Home, Labels And Archive Pages) Are 800 You Can Change It With Your Desire.
3.) If Your Post Have Images Then The Words On Main Pages (On Home, Labels, And Archive Pages) Are 180 You Can Change It With Your Desire.
4.) Height Of Thumbnail Of Your Image On The Page (On Home, Labels, And Archive Pages) Is 240 You Can Change It With Your Desire.(It Is Calculated In Pixels)
5.) Width Of Thumbnail Of Your Image On The Page (On Home, Labels, And Archive Pages) Is 240 You Can Change It With Your Desire.(It Is Calculated In Pixels)
6.) You Can Change The Words “Read More...” With Your Desire, If You Want To Show An Image Instead Of Text Then Change It With
<img src="https://blogger.googleusercontent.com/img/b/R29vZ2xl/AVvXsEicFR6Buc2GadScO7aMYeYo1Xu2V-3qyJp-VVR1qoUUYyqSEKj7RhG7watai3c_3rnirK8npBHBTCsol9f939M88ZTFAhGgtYnCTBep7nppKuRvv3tJL8ic5Z1RmoUDl0jsxutDj6NQ4w/s1600/Read-More-Button.png" style="float: right; margin: 0 10px 0 5px;" title="Read The Full Awesome Article" alt="Read More" />
Next/Prev/Home Buttons Bugs Fixed:
If You Have A Custom Template Or Blogger Official Template, There May Be A Bug After Adding The Above Code That Will Hide Your Next/Prev/Home Buttons Which Are At The Near Of End Of Blog And Move Them Anywhere Else. If You Are Watching This Bug Then Don't Feel Horrible Because Here IS The Fix For You.1.) Go To Your www.blogger.com
2.) Open Your Desire Blog.
3.) Go To "Template".
4.) Click "Edit HTML".
5.) Click "CTRL+F" Inside The Template Box To Find <b:includable id='nextprev'> Code.
6.) Now Copy The Below Code And Paste It Just After The Above Code.
<div style='clear:both;'/>
Video Guide

0 comments:
Post a Comment