Showing posts with label Rooting guide. Show all posts

Thursday, 26 October 2017

How To Flash Custom Phiz Recovery in Micromax Unite 3 Q372 With PC

Hello geeks, as I know many of them are having interest in trying new ROM and customizing their device but it needs two main things first is rooting and second is a custom recovery which will be discussed over here now. many android geeks think that the next step after the rooting is to install the custom recovery. By custom recovery, you will able to make great changes and modification in your device. finally, the good news is that the stable recovery for Micromax unite 3 Q372 has launched


Let's come on recovery.

Required Files

1) Phiz Recovery - Click Here to Download
2) SP Flash Tool - Click Here to Download
3) Media take Root And Recovery Tool Kit - Click Here to Download
4) Beta Super SU.Zip Click Here to Download

Watch This Video To Flash Phiz Recovery Full Tutorial

Tuesday, 12 September 2017

How to Flash Stock Rom on Xiaomi Redmi 2(2014818) And Bypass Mi Account Verification Step


Recommended Files:-

Download Redmi 2(2014818) Stock Firmware
http://adf.ly/16244537/mi-stock-firmware
Download Mi Flash Tool
http://adf.ly/16244537/mi-flash-tool

1. Download ROM from the above link (Which One You Want to Flash) and extract it to Desktop.

Note: - Some users get an error while extracting on-desktop Because there is space in the username of PC or the folder as shown.

The users should put the ROM In C Drive in a folder without spaces. E,g C:/ROM/MIUI

The Error is shown when using space between folder name


2. Download flashing tool from the above link and install it.

3. Once installation is complete, Run MiFlash application


4. Click on browse


5. Select ROM folder from Desktop(From the location where ROM is saved)


Note: -The path of the ROM folder Should be like "C:\Users\Muzamil\Desktop\MIUI" Not "C:\Users\Muzamil\Desktop\MIUI\images"
The MIUI ROM folder should Contain the following files


6. Turn off the phone, press and hold the Volume Down key and the Power button at the same time to enter Fastboot mode, then connect the phone to a Computer

7. Press Refresh button to see your device in flashing tool.


After pressing refresh button you will see a connected device.

Here You have 3 options to select.
Choose the options carefully as per your need:-
1. Flash_all:- Clears all the data of the built-in storage, clear all user data, please be careful!(Clean Install)
2. Flash_all_except_storaget:- Will erase all user data does not clear the built-in storage data.
3. Flash_all_except_data_storage:- Does not clear the built-in storage data does not clear user data
Note:- It is advised to take all personal data backup on PC/Laptop


8. Click on Flash and it will start process


9. Once flashing process completes


The device will automatically reboot. A reboot might take up to 5 minutes.

Video Guide


Thursday, 17 August 2017

Download Xposed Framework and Installer with Installation guide

Xposed is one of the most beloved tools an Android enthusiast can have, as it allows for all sorts of modifications to extend the functionality of our favorite devices. If you don’t like getting your hands dirty by compiling & decompiling different System files, then Xposed Installer is the perfect App for you. You can perform all the changes to your choice in just a few clicks. Xposed is an essential app required to run various different Xposed Modules to add extra functionality to your Android devices such as Changing Statusbar Icons like Xperia, iOS, Greenify or any other.

Few users didn’t update their device to Android Marshmallow as Xposed Framework was not available for Android M after the launch of Android Marshmallow. It been a while now since Xposed Installer is available for Android M. Without wasting much time, let's get started. This guide works with Android Lollipop too. After Android KitKat, one cannot install Xposed directly in their device. Due to too many restrictions & updated from Android Lollipop, Xposed was installed in parts. First, we need to flash the Framework which hooks into the system & then the installer that uses the Framework to change system files.
Image result for Xposed Framework and Installer
For Samsung devices: Xposed for Samsung Lollipop & Marshmallow.
Prerequisites:
  1. You must have a Rooted Smartphone: How to root any Android device in one click.
  2. A Custom Recovery like TWRP/CWM: CWM for MediaTek | Nexus | Motorola.
  3. (Optional) Backup all your data & Apps before flashing the Xposed framework file to avoid data in case anything goes wrong or your device doesn’t boot up.

Download Xposed Framework and Xposed Installer

Android Lollipop (5.0/5.1)

Image result for xposed framework for lollipop 5.1

How to Root OnePlus 3T and Install TWRP

Are you the Oneplus 3T user then here is a good new for you. Now you can easily Root OnePlus 3T and Install TWRP. All you have to unlock the bootloader of your Oneplus 3T first, after that you can get the root access on your phone with the help of TWRP recovery. The process is very simple and on;y take ten to fifteen minutes to complete the whole task.

Here you will learn how to install the TWRP custom recovery on the Oneplus 3T and Root the OnePlus 3T. All credit goes to the XDA developer JCA DDU ono who provide the unofficial TWRP for OnePlus 3T. So here is the step by step guide to Root and Install TWRP Recovery on OnePlus 3T. Read all the steps very carefully and follow all the steps open by one on your phone.


Why Root Oneplus 3T

  • Once the phone is rooted, you can easily install the Custom ROMs and custom Kernel to improve the performance of the phone.
  • Install the Rooted apps and Xposed framework on your phone.
  • Block unwanted ads on the applications.
  • Tak the Full system backup (Nandroid backup) of your phone.
  • Remove unwanted system application once the devices are rooted.

Things You Need to Root Oneplus 3T

How to Install TWRP on Oneplus 3T

1. First Unlock the Bootloader of your phone. If you already did that then follow the next step.
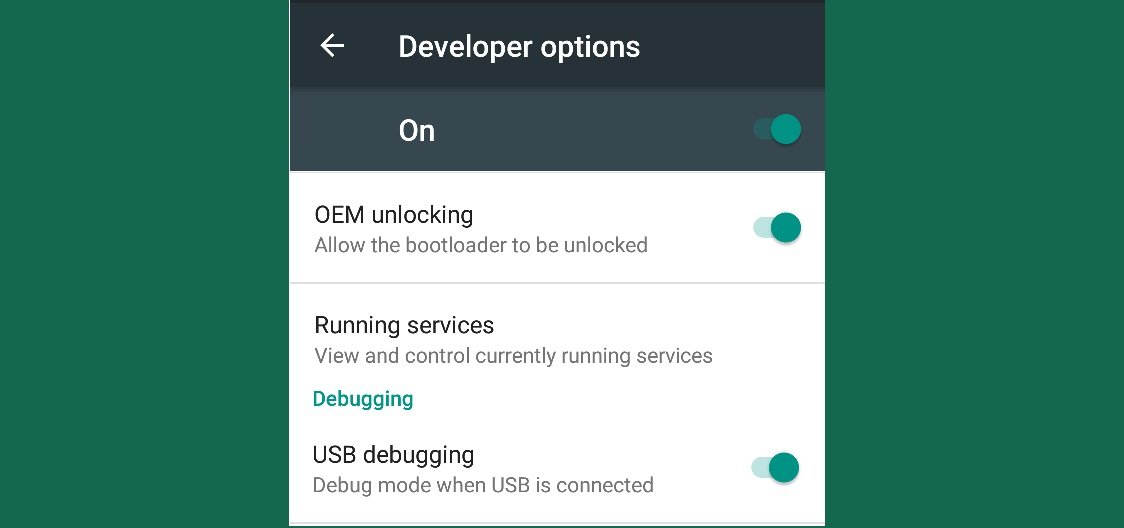
2. First, you have to enable USB debugging mode and OEM Unlock on your phone. To enable Developer Options, go to About phone and tap the Build Number 7 times. And enable USB debugging and OEM unlock.
Usb-debugging-and-OEM-Unlocking
3. Now open the ADB folder on your windows and press and hold ‘shift’ key and right-clicked anywhere in the folder and selected ‘Open command window here.’
4. Copy the TWRP recovery file (twrp-1.1.1.2-oneplus3t.img) on the ADB folder that you created above. Rename the twrp-3.0.2-0-oneplus3t.img file to TWRP.img.
5. Now connect your phone to the PC with USB cable and enter the following command in the command prompt to boot your phone into Fastboot mode.
adb reboot bootloader
6. Once your 3T boots into bootloader mode, issue the following command into command window to flash the TWRP.img file:
fastboot flash recovery TWRP.img
7. Now type below command to boot into recovery.
fastboot boot TWRP.img
Now the TWRP custom Recovery is successfully installed on your Oneplus 3T and your phone is on the TWRP mode.

Root Oneplus 3T

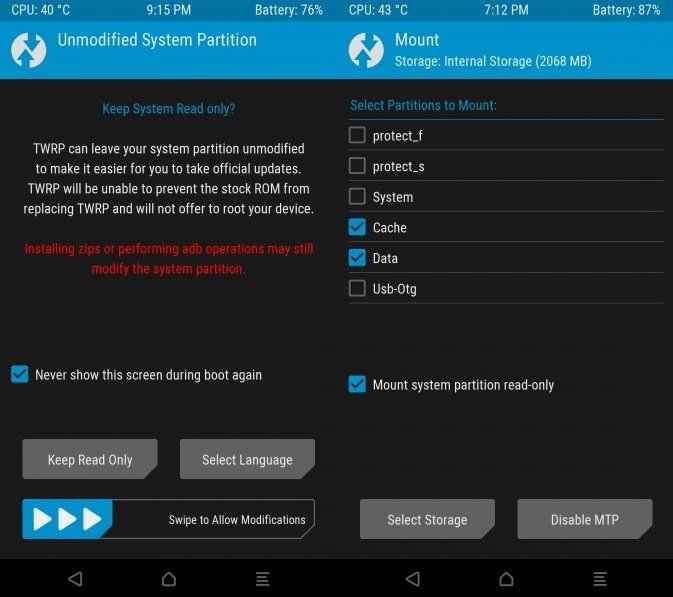
1. Now your phone will boot into the TWRP mode. From the main page of the recovery select your preferred Language and set it to what you want, tap “Never show this screen on boot again,” and Swipe allows modification.
twrp-oneplus-3t
2. Now transfer the no-verity-opt-encrypt zip file to your device over MTP and flash it. GO to install and Locate the no-verity-opt-encrypt zip and flash the same.
3. Go to “Wipe” section and tap “Format Data,” and type “yes” (If you want to mount internal storage).
4. Now again go back to the main menu and Select install and select ‘SuperSu.zip’ to root OnePlus 3T.
5. Once the Super SU zip file is flashed on your phone. Reboot System.
Now your Oneplus 3T is rooted and TWRP Custom recovery is successfully installed. If you have any questions, then comment below.

Tuesday, 15 August 2017

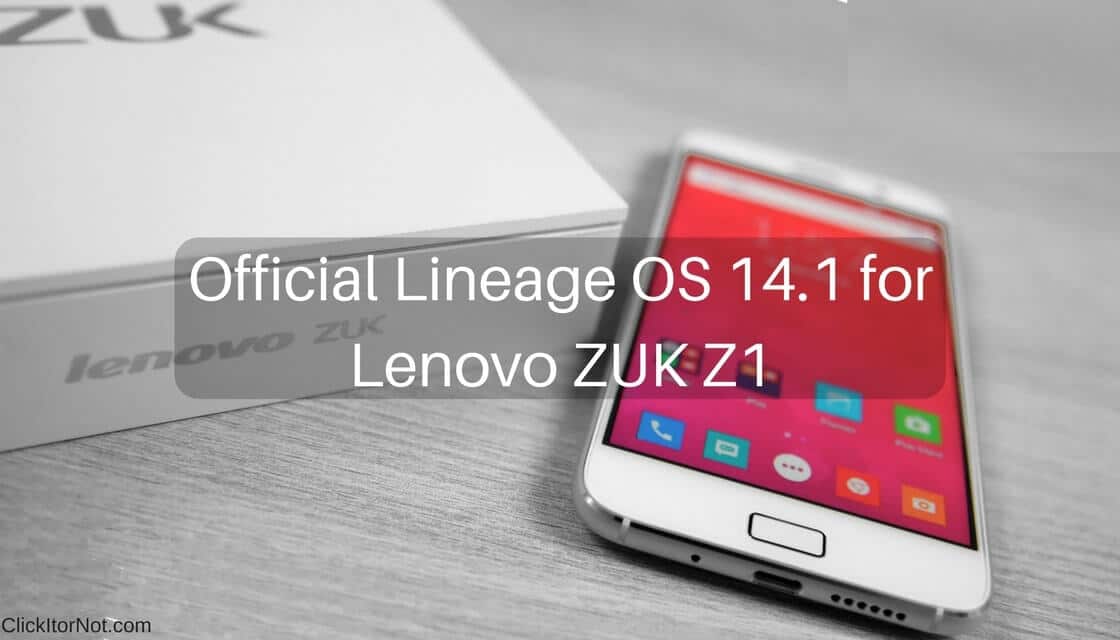
How to Install LINEAGE OS 14.1 (Nougat 7.1.3) on Lenovo Zuk Z1 Full Installation Guide With Video


Image result for lineage os 14.1 on zuk z1
The Lenovo-Motorola combination seems to be working good at low- and mid-range mobile segments, as while ZUK series is doing decent enough, the Moto G series continues to rock. And when you are talking about a popular device with a good set of users, developers usually follow, provided the device in question is developer friendly in the first place, which is exactly the case with Lenovo ZUK Z1.

While Lenovo may not have any immediate plans for updating the ZUK Z1 to Nougat, which is out for the ZUK Z2 BTW, the device has found its savior in the custom ROM development scenario. Starting today, Lineage OS ROM is officially rolling out for the ZUK Z1, bringing the Android 7.1.1 update for the device, albeit in an unofficial way, but at least users have a fair reason to rejoice now.

The ZUK Z1 LOS ROM is already available as a nightly, which is better than the experimental build, so, in case you were looking to give it a go, you can. We think the stable release would follow sooner or later, but we don’t have our hopes tied on the former.

Lenovo ZUK Z1 Lineage OS
Downloads


  • Official build: Available, check the download link below:
  • Gapps: You need this to get Google Play Store app, Play Services App, and other Google apps.
  • Root add-on package: Download Link
  • Note: You must have a custom recovery like TWRP installed on your device to be able to install Lineage OS. Also, you will need to download and flash root add-on package separately as Lineage OS only provides root via ADB.

    How to Install Lineage OS on ZUK Z1

    1. Download and transfer the Lineage OS ROM zip file and Gapps package zip file that you downloaded above to your ZUK Z1.
    2. Boot your ZUK Z1 into TWRP recovery.
    3. Select Wipe from TWRP main menu and do a Swipe to Factory Reset on the bottom of the screen.
    4. Go back to TWRP main menu, tap on Install and select the Lineage OS .zip file that you transferred to your ZUK Z1 in Step 1.
    5. After selecting the .zip file, do Swipe to Confirm Flash on the bottom of the screen to begin the custom ROM installation process. This may take some time.
    6. Once your ROM is successfully flashed, you’ll see Wipe cache/Dalvik option, select it and then do Swipe to wipe on a bottom of a screen.
    7. Now flash the Nougat Gapps file similarly, just the way flashed the ROM file.
    8. If you want to root for apps, download and flash the root addon zip file as well.
    9. Once you’re done flashing all required files, reboot your ZUK Z1.
    That’s all there is to it. Lineage OS is now installed on your Lenovo ZUK Z1.
    Full Video Guide To Flash Lineage Os on ZUK Z1:-

Friday, 11 August 2017

How to Unlock, Root and Install TWRP Recovery on Lenovo ZUK Z1

The Zuk Z1 is a budget smartphone by Lenovo which packed with advanced features.
Zuk Z1 running on the latest CyanogenMod OS. The bootloader of Lenovo ZUK Z1 is unlockable means you can easily Root and Install TWRP Recovery on Lenovo ZUK Z1. Also, we know that TWRP 3.0.0 released recently means you get the latest TWRP on Lenovo ZUK Z1.
The process of Lenovo ZUK Z1 root is very easy all you need to follow the steps.
But before you root ZUK Z1, you need to unlock its bootloader (check How to unlock Bootloader of Lenovo ZUK Z1).
So before we explain to you how to root and install TWRP recovery on Lenovo Zuk Z1, you can check why you should root your device.

Image result for Root and Install TWRP Recovery on Lenovo ZUK Z1


Some benefits of Rooting –

You can install custom ROM and custom kernel on your device for faster and better performance.
Block Ads in apps with the help of ad blocker.
Increase performance and battery life by killing background process automatically.
After you root Zuk Z1 and install custom recovery you can install Xposed Framework to customize your device
You can use Titanium Backup to restore all of your apps and data.
You can uninstall bloatware (Pre-installed Apps)


Note:-

Rooting may void your phone warranty, and you won’t claim it back.
Follow the steps correctly otherwise you may brick your device. We are not responsible for any damage to your phone.
It will erase all your phone data, so we advise you first to take a complete backup of your phone and then proceed.
Ensure that your phone has at least 50-60% charged to prevent the accidental shut down in-between the process.


Files required to Root Lenovo Zuk Z1 and Install Custom Recovery –


  • Download ADB and fastboot driver for windows or ADB and Fastboot for Mac and install it on your PC. This will also install your device driver.
  • Download and install Drivers for Lenovo ZUK Z1 if above doesn’t work.
  • Download Zuk Z1 Toolkit and place it in the folder where ADB installed and rename it to ‘recovery.img’.
  • Download SuperSu to root Zuk Z1 and copy it to your phone sd card.
toolkit

Unlock and lock bootloader
- Root
- Flash RECOVERY TWRP and Recovery Recovery Recovery
- Install and Uninstall Xposed (You must install this before installing Xposed)
- Download and flash 38J CM12.1
- Do some ADB and fastboot commands (startup in custom recovery, sideload a zip file, stock reflash with a downloaded image, check bootloader status ...)
- Install ADB and fastboot

Instructions for Windows

- This toolkit has been run with Mac. In order to use it on Windows, you will need to download Cygwin.
- You will need USB drivers to use ADB. If they do not try to use the Samsung ones. I tried both of them on Windows 10 and I can not run them with adb.
- You will also need adb and fastboot that can be installed here quickly
- Download the Windows version of the toolkit on the download section and decompress it.

- When you have made every step, open Cygwin terminal.
- Type 'sh' and drag start.sh to the terminal.
- Press submit and you will have the working toolkit.
- Read all the instructions on the screen carefully.

Link download TOOLKIT ver.0.4.3:
(Refer to the original article for updates)

Wednesday, 19 July 2017

Top Most Android 15 Killer Tricks After Do Rooting Your Android Mobile

Hey, Fellas! You might have rooted your Android device. Now, you might be thinking what next? Right? So today in this trick I will be telling you What To Do After Rooting Android 15 Killer Tricks.
Image result for Whats Do  After Rooting Your Android
As we all know that we have rooted our Android device just for some reasons. We can also say that we have rooted our Android just because we want to expand our RAM? Or any application such as Dolby Atmos on our Android device.
This is something which is really amazing. If you bought any Android device. If you have not rooted your device. Then you have missed really a fan of using Android device.
Most of the times people are confused that after rooting their Android device the warranty might get void or something. But people don't know about the good features of rooting of their Android.
Yes, after rooting your warranty might get void but, after unrooting your Android device you will get your warranty back too. This is something which most of the people’s doesn’t know about it. People’s are confused related to an Android rooting topic.
If you are new and don’t know what is it? What things you can do after rooting your Android device. Some of the killer tricks which you can try with your Android device. Let’s get started with it. 
1 How To Install Dolby Atmos On Your Android Device.
Now, if you are fond of music then this is the best application which you can try with your rooted Android application. Installing the Dolby Atmos on your Android device is easy.
You can easily install it on your Android device which is above 4.3 Jelly bean. This application will work absolutely fine. I have installed this application on my Android and the sound quality is superb.
If you love this tutorial of installing Dolby Atmos on your Android device. You need a custom recovery such as TWRP or CWM recovery on your Android device. We have explained this guide properly, You can follow up this guide easily by clicking on the given link How To Install Dolby Atmos On Your Android Device
After Rooting
2. Build Prop Tweaks For Android Jelly Bean, KitKat & Lollipop Devices
Build Prop is something which is a core of your Android operating system. Why? Just because if you want to increase your Android sound here build prop comes. If you want to add up some extra features on your Android device. Then here build prop comes in the show and does all you’re adding up features.
We have mentioned here the tricks for jelly bean, KitKat, Lollipop. Which is amazing. If you know Android development then you can create your own codes and add up in the Build Prop.
Editing build prop is risky and if you don’t know how to boost up your performance and don’t have known so please stay away. We have shared a proper guide about this tutorial and you can follow up this guide by pressing the given link from here Build Prop Tweaks For Android Jelly Bean, KitKat & Lollipop Devices
Image result for Build Prop Tweaks 
3. How To Increase Battery Life Of Your Android Smartphone
Battery life is something which is important a lot if you are using any Android device. Most of the times people check the battery performance and other features before buying the mobile phone. Nowadays many smartphones are having quick charge feature which allows you to do .ss % charge in some minutes.
There is an application called as green which will save your battery. Basically, greenery stops all the applications which are running in the background and which is consuming all your battery life. If you are using Android 6.0 then you have to allow accessibility. Also, check out full guide from here How To Increase Battery Life Of Your Android Smartphone
Related image
4. How To Flash Custom Recovery/Kernels Using Flashify
Flashify is a tool which helps users to flash the kernel and custom recovery. This is the great tool from which you can do all these settings in a single click. Flash kernel and custom recovery in one click if you have you rooted Android device. Simple easy and fast. We have explained about what is the kernel, recovery and Custom recovery. You can check out the full tutorial from here How To Flash Custom Recovery/Kernels Using Flashify
After Rooting
5. How To Install Viper4Android Fx On Your Android Device
Viper4android fx is a tool from which you can increase the sound of your Android. If you can’t install Dolby Atmos on your Android device. Then you can try this method on your Android device. You just need a rooted Android device. To increase the sound of your Android device. Then this application will do all the settings. You just sit back and reboot your Android device. It is good if you are fond of music then this is something which is amazing and tries on your Android device. But you need to take care while installing this application in your Android. Just check out the tutorial given below How To Install Viper4Android Fx On Your Android Device
Image result for Viper4Android Fx
6. How To Flash Custom ROM On Android Safely
As we all know that Android operating system is been used by many of the people’s around the Developers keep on doing developing the Android. They keep on developing the custom ROM for many operating systems. The best custom ROM is the one which is not having bugs and not having any kind of errors. In this tutorial, we have explained properly that how can you install custom ROM on your Android device. Without any issues and errors. We have explained properly in this tutorial that what is custom ROM, stock ROM and the complete information about all the Android operating. If you are interested in flashing then this is the best guide which you can follow up on your Android device. How To Flash Custom ROM On Android Safely
Image result for how to install custom ROM

7. How To Remotely Turn Off Your Android By Sending an SMS

If you want to Prank your friends then this is the best application. Just because this application will switch off your Android device. Just by sending a simple SMS. You will be able to send a password. This password will be recognized by the application and it will switch off your Android. Best and amazing trick which you can follow up on your rooted Android mobile phone. This is the reason why we are sharing this guide with you. You can follow up this guide from here How To Remotely Turn Off Your Android By Sending an SMS
Image result for Remotely Turn Off Your Android By Sending an SMS 

8. How To Get Unlimited Likes On Instagram

Instagram is the application which is trending a lot in some days. This Company is bought by Facebook. You can share images on Instagram and you will be able to get likes. If you need more likes then you have to get more followers on Instagram. As more the followers and you get the good lines. In this tutorial, we have shared that how can you get more likes on your Instagram account with the help of this application. Images will get more and more likes. But you have to make sure that you don’t get banned using this trick. Follow up this guide from here How To Get Unlimited Likes On Instagram
what to do after root

9. How To Prank Your Friends With Network Spoofer Application

Network Spoofer application is of networking category. Suppose any user is using a WiFi and you want him to browse any site or flip the content of the site. Then this is something best and amazing application which you can try? Why? Just because you can Prank your friends by showing them something which they don’t want to see. Then you can also share some funny images with this application. It is perfect and working absolutely fine in any wifi connection. It is really a fun and a trending topic. We have shared a complete guide to this application have a look here  How To Prank Your Friends With Network Spoofer Application
what to do after root

10. How To Modify WhatsApp Messages Using WhatsHack

This is really one of my best application. Why? Just because you can modify your WhatsApp messages with the help of this. When you will be using this application you need a rooted Android device. You will be able to change the WhatsApp message and also the time too. Usually, I fool my friends with this application and it is really easy to do those settings. Sometimes the application crashes but we have shown you how to do all the settings when your application crashes and a complete guide you can follow up and have a look at the complete guide from here How To Modify WhatsApp Messages Using WhatsHack
Image result for WhatsHack

11. How To Unlock Pattern Lock Without Losing Data On Android

We often search on Google about this topic. What if you forget your mobile phone pattern lock? You might have come in this situation and you might be thinking what to do in this situation. We came up with the tutorial in which we have shown a guide in which you can easily Unlock your Android device that too without losing your phone data. Most of the times people format their devices but with the help of this tutorial, you can do this great tutorial you can unlock it. What you need is a custom recovery installed on your device and all the things will be done by this application. This tutorial is fantastic to have a look at this tutorial from here How To Unlock Pattern Lock Without Losing Data On Android
Related image
 12. How To Install Xposed Framework On Android 6.0 and 6.0.1 Marshmallow
Xposed Framework this is something which a user is in need of this application. why? Just because it is having hundreds of modules which actually do all the customization of your Android device. As we all know Android is getting updated every year so we have shared a complete guide about how can you install those applications on your Android device. You need a custom recovery to flash those zip files and then you will be able to flash that zip file on your Android device. A complete backup is necessary before following this method have a look at this guide from here How To Install Xposed Framework On Android 6.0 and 6.0.1 Marshmallow
what to do after rooting

13. WiFi Kill App – Prank Your Friends WiFi By Killing Their Friends WiFi Connection

WiFi kill application is one of my favorite application why? Just because I always use a public WiFi with the help of this I kill the wifi connections of my friends. They get confused about this application and think what just happened ðŸ˜€ This application stops the wifi connection which is connected to your wifi network or else any application. If you are having a rooted Android application then this is something best and amazing guide which you can follow up. Basically, this application sends the packets that this is the wifi router means your mobile phone. It is something which you should give a try to your rooted device. Have a look at the complete tutorial from here WiFi Kill App – Prank Your Friends WiFi By Killing Their Friends WiFi Connection
After Rooting Android

14. How To Customise Your Android Device With Gravity Box

If you are using an Android operating system which is having vanilla OS. Then this is really a great application. You can do any customization with the help of this application. It is really a great application. You can customize icons, battery bars, status bars and many other kinds of stuff with the help of this application. You can also add up navigation bar which is used in Lollipop and change all those settings. It is a complete package which is really a great and superb thing. Contains about hundreds of settings and you can enjoy a look of Cyanogen Mod on your Android device. Have a look at this tutorial from here How To Customise Your Android Device With Gravity Box
After Rooting Android

15. How To Increase RAM of Your Android Device Using SD /Memory Card

Many of the people encounter this error of shortage of RAM. This is something which comes after your Android device becomes old. After 2 to 3 months your RAM gets the problem. We have explained a great article about how can you increase your Android RAM with the help of the application. Rohesoft RAM expander actually increase your phone RAM with the help of the application. Amazing and really working guide you can follow up have a look at the complete tutorial from here 
How To Increase RAM of Your Android Device Using SD /Memory Card
After Rooting Android

Conclusion:

This is the best trick which you can try on your rooted Android device. This was some killer and amazing 15 tricks you can follow up after rooting your Android device. Isn’t it amazing? Follow up these guides if you face any issues feel free to comment below. Thank you for visiting and keep visiting for more tips and tricks like this. Peace out.